Most people don’t think of summer as prime harvest season for crops — after all, corn and beans and many types of tomatoes still have a lot of time left until they mature. However there are folks picking apples in the pounding heat, while others may be out cutting hay or wheat. This is also the time of year for harvesting garlic.
As with anything, scale can play a factor in how garlic is harvested and handled, as tools and mechanization vary dramatically. I’ve been growing garlic for a little over 10 years, and have largely focused on hardneck varieties (Persian Star, Siberian, Georgian Fire) though have done softnecks (Inchelium Red) before, too.
Because garlic bulbs are underground, I’ve often been asked how do I know when they’re ready. They’re in the ground a long time — ours in Virginia are planted the first week of November and typically harvested in late June — and factors such as snowfall, winter’s deep freezes, and spring rain play a major role in when they’re harvested. It’s really a game of precision. If you dig too early, you’re likely to have woefully undersized bulbs. Wait too long and the bulbs could break apart, affecting long-term storage — or, worse, they could rot in the ground.
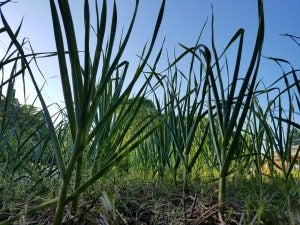
If you’re working with a hardneck variety, one of the surest signs that you have strong healthy plants is the individual scapes that shoot up in spring. They may look interesting and get quite tall, but they’re also stealing energy away from the growth of the main garlic bulb. Once the scapes begin to curl, usually in April or May, depending on the variety, I cut them off close to the main stalk and store in the refrigerator (I remove the seed pod before using the scapes in salads, soups, or a variety of other dishes). Enjoy their flavor and think of the scapes as a sampling of what’s to come, because even though that chore is done, you still have a long while before you can harvest the bulbs themselves.
I get very attentive of my plants in early June, trying to watch for signs of their readiness. I look for the dying back of the leaves on the garlic stem (a good resource on the parts of a garlic plant can be found here). Usually, when the bottom few leaves show decent signs of withering and browning, I’m ready to remove the garlic from the ground. If you’re working with softnecks, it should be no surprise that as harvest time arrives, the stalks will begin to topple over because their necks are, well, soft.
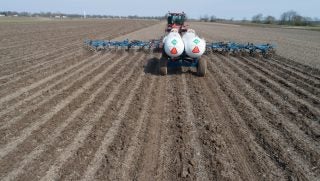
Because I’m usually working in quantities of only a couple thousand bulbs, I loosen the soil and hand dig and clean the bulbs individually as opposed to using a tractor — though I will admit that some years, I wish I had the right machinery to make my job easier. If I did, it would look something like this:
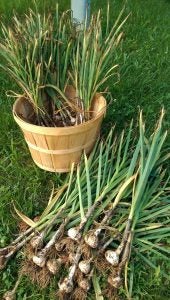
Once out of the ground, the garlic is bundled in groups of about 10 using jute twine (with a loop at the end made with a knot called a figure 8 on a bite — a very handy one to know). I don’t cut the stalks or the roots during the curing process, as the garlic bulbs can continue to take in nutrients from these sources. Many people simply lay their garlic out in the sun for a day or two after harvest to let them cure, but because of my region’s humidity and the variations in weather patterns in summer (think pop-up thunderstorms), I’ve never subscribed to this approach.
I hang my bundles in a cool, dry place with a bit of airflow for about three weeks as the remaining leaves die off.
In my early years as a grower, when my harvest count was in the hundreds rather than the thousands, I built drying racks using chicken wire where I placed bulbs individually upside down, so that all the moisture would more easily leave the plant. It did seem to cure the garlic more rapidly, though it wasn’t necessary in the big picture of the process. I’ve had no problems since I stopped doing that.
After a few weeks, I am able to take them down and begin slicing off the roots and trimming the stalks into the form that most people recognize from the grocery store. This is a long process, again something that’s not mechanized on my farm, and is usually done in waves as my need to process or sell my garlic arrives. If you have softneck garlic, you can remove the roots and braid the stalks — something that, anecdotally, seems to be a hit at farmers markets.
Stored properly, even being left to hang in their bundles, my garlic easily lasts until February — and with some selective cutting of the cloves in the kitchen, my family can eat them long into March and April.
If you’re growing garlic on your farm or homestead, like any crop, there are diseases that can affect the plant’s life cycle. Rust and white rot are two common diseases, and more information on those, as well as some preventive measures for disease and insect activity, can be found at this Garlic Matters link.
Though perhaps not one of the most vital crops from a global food security standpoint, garlic is highly profitable and is certainly one of the most renowned and adored by chefs and home cooks. When you love it as much as I do, it’s almost hard to find a recipe that isn’t worth adding a couple of cloves to.
And with so many varieties available to try out and plant, you’ll have an enjoyable growing season finding the one or two that fit your farm the best.